Feeds:
Posts
Comments

2018 Thanksgiving


I’ve decided to start writing about my weight loss journey and just life again. Its been quite a few years since I published anything. I’ve been loosing weight for the last five months and decided it might be nice to see it chronicled, so if your interested, follow along.  It will take me a few weeks to get you up to date on what I’ve learned in the last five months.

Today’s Thoughts:

My first dieting Thanksgiving was forty eight years ago.

I was  fifteen and not old enough to drive yet, because my Mom had to take me to Teenage Weight Watchers meetings.  I don’t know why she signed me up, but every Saturday we would drive across town to attend the meetings.

I was tall, already 6 ft. and well developed, I can look back at this picture of me at that age and I don’t see a fat girl, but I do believe this developed a diet mentality in me.

Margaret


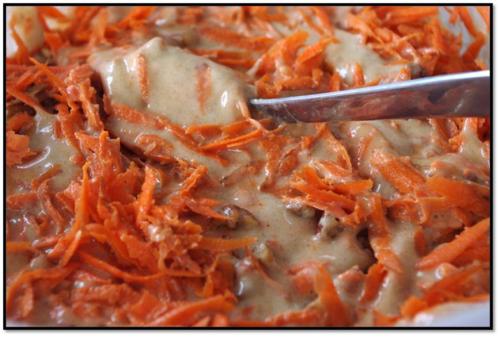
I went to the meetings and listened to the lady leading the meeting preparing us for eating WW at Thanksgiving.  Turkey was fine, vegetables, sweet potatoes just limit the portions but for some reason dressing wasn’t  allowed, so we were given a recipe for cauliflower dressing.  Cauliflower isn’t a new discovery of the low carb crowd, it was used way back then.  The recipe consisted of mashing the steamed cauliflower and adding sage seasoning to it, there may have been a few other ingredients, but I don’t remember anything but about how awful it tasted.  I really expected it to taste like Grandma’s Southern Cornbread Dressing, boy was I surprised, this stuff was nasty.  I think I probably quit WW that day because it was impossible to live on and I’ve always loved good food.

I’ve dieted for many years, but never again did I diet during the holidays, I’d always start after the New Year with any new diet.

2018 I started again at the first of the year on an online app that counted WW points.  I lost a few pounds, but it was the same old diet.  I worked in my garden and that was my exercise.  I had convinced myself that I couldn’t walk long distances anymore because of problems with my knee, hip and back.  By the first of June I had lost 25 lbs.

My husband Harvey had type 2 Diabetes and had been on Metformin for fifteen years. He had got a prescription filled and his body wasn’t working well with it. For the last few doctors visits they had talked about adding more diabetes medicine.  Even with taking the Metformin his blood sugar numbers were running high.  He started researching online if Diabetes could be controlled with diet and kept finding information about Low Carb, High Fat diets (Keto) that people were actually able to eventually get off their diabetic medicine. He decided that he was going to try a Keto diet.

All I knew about Low carb diets was the Atkins Diet which I had tried 12 years before.  I lost 6lbs and then I couldn’t loose anymore. I was going to the gym at the time and would weigh myself and be so disappointed, I hadn’t lost a pound. I knew people who had lost lots of weight on the diet, so I couldn’t figure out what I could be doing wrong.  I bought two of Dr. Atkins books and read them both. The book said if you didn’t loose weight you must be insulin resistant and you had to go on an 1000 calorie egg diet for a week and that would break it.  Well, I still didn’t loose any weight, so I quit and said it wouldn’t work for me.

I got out the Atkins books and read them again and tried to proceed with the diet again.  I had already made my mind up that we weren’t going to be cooking two different meals, and getting Harvey’s blood sugar down was the most important thing, so I would go low carb.   I started checking out the Keto diet, not really understanding what it was or how it worked.  I started watching Dr. Berg’s You Tube videos on how to heal diabetes by eating a Keto diet and we started following his plan.  I joined his facebook group and heard about an app called Carb Manager.  I downloaded the app and started learning this new way of eating.  I knew what carbohydrates were, but had no idea how much were in foods.  In the old WW points, I knew automatically how many points food was, but I had no idea there was carbs in vegetables, fruit.  We were having to learn a whole new diet language and a way to eat.

We jumped in, feet first.  The app would let you set the parameters at low carb of 50 carbs a day, or Keto at 20 carbs a day.  Keto it was, if we were going to do this, we were going to do it right! The average person eats 200 grams a day. Looking back, we might should of started at 50 carbs and learned how to eat that way and then lowered it later to 20. We didn’t know anyone else eating this way and our understanding was that Keto was 20 carbs so that’s what we ate.

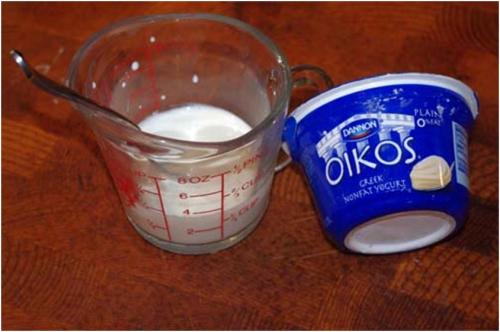
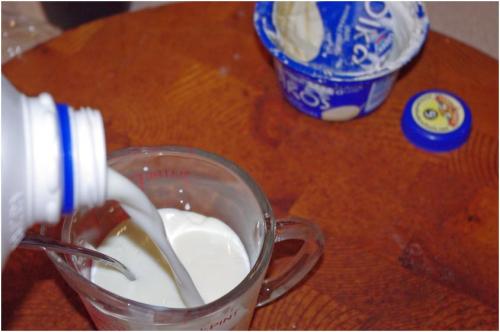
No toast, no biscuits, no gravy, no jelly, no orange juice. Just bacon or sausage and eggs for breakfast.  Of course we could eat those to our contentment because there are no carbs in meat and eggs were 1 carb for two eggs.  We were satisfied, it was just different. But that coffee, now that was a problem.  I don’t drink black coffee. I like milk with a little coffee.  I added my coffee to my Carb Manager app and found out that a cup of milk was 12 carbs for a cup of whole milk.  Well this was a problem, when you only get 20 carbs and 12 were spent on coffee, I had to make a change, 8 carbs would have been all I had left for the day. Then I heard that Heavy Whipping Cream was low in carbs, in fact 2 Tablespoons only had 1 carb. I would take 1 cup of water and heat it in the microwave then add my 2 TBSP of cream and mix that in and then add my coffee.

Screenshot_20181122-213626_Carb Manager

I’ll continue more next post with how the diet works and what we’ve learned and our results.


Back to Thanksgiving 2018

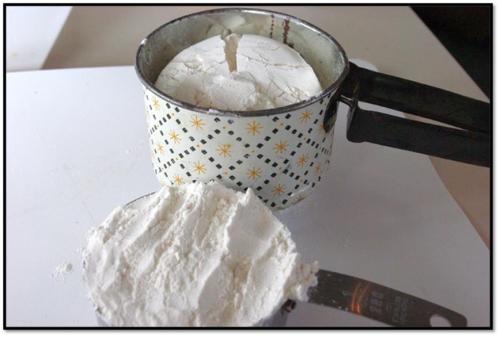
After five months of eating this Keto way of eating, I wondered could we do this Thanksgiving Keto? I started looking for recipes, I found lots of them, and yes there are still recipes for cauliflower dressing.  But there are also recipes for Keto Cornbread dressing.  Corn and cornmeal are high carb, but almond flour has proven to be a good substitute for cornmeal. I decided not to make the dressing this year, Harvey made the traditional dressing and noodles for his children, I just passed on them.

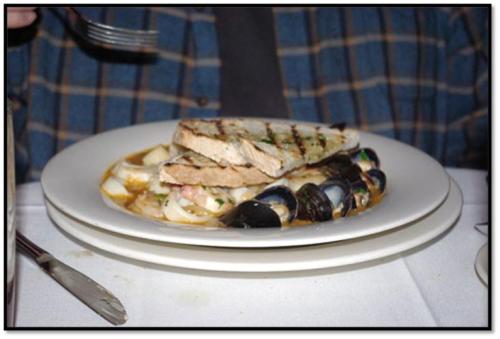
Our menu was turkey which we brined and smoked, made a herbed butter and rubbed it under the skin, best turkey ever! Brussel sprouts tossed in olive oil, roasted with parmesan cheese sprinkled on it. Spring mix salad with full fat dressing, Harvey’s mom’s Cranberry Jello Salad reworked. Sugar free raspberry jello with chopped pecans, fresh cranberries, celery and served with sour cream on top. For desert I made a cheesecake with Monk fruit for sweetener, with a pecan crust.

I had commented on a recipe my cousin posted on face book that if we could manage Thanksgiving and stay on Keto we could pass any test.  I must say, I passed the Thanksgiving challenge and I am proud of myself!


Does trying something new frighten you, especially something like making cheese or yogurt? We seem to have this mentality anymore that it isn’t any good unless you buy it from the grocery store. WRONG! I’m discovering that as we learn how to make these things at home they are so much better. No additives, preservatives, artificial flavorings. Just pure goodness.

Yogurt is one of those things for me that has always been scary, it seemed complicated. I would read blogs where people made it and I would say to myself, “Naw, too hard, too much effort.” I finally decided one day, just try it. I’ve been making yogurt now for a month. Each time refining the method and trying to make it simpler. This tutorial is a pictorial of my method. There are other ways to make it, but this works for me.

So for lack of a better name we are going to call this the Ice chest method.


Get out your ice chest and scrub it good and rinse it. Then pour boiling water in it to sterilize it.

Equipment you will need:

Large stock pan

Quart canning jars, with band and lids (Can use clean mayo jars., just make sure there are no smells as this will transfer to yogurt)

Thermometer

Long teaspoon to stir

Ice chest

Ingredients:

1 container good quality Greek yogurt with live active cultures.( I’ve used Fage Greek Yogurt and Dannon’s Oikos Greek yogurt.)

Milk, depending on how much you want to make


Starter:


You will need 2 -3 Tbsp yogurt for each quart.


Add ½ cup milk to yogurt and stir, we will add this later


Fill your quart jars to ½ inch below the ring with milk, you’re leaving space to add your yogurt culture later.

Add your jars to stock pot and fill with hot water, turn on stove burner to med high.

Using this method, your jars are working as a double boiler so you don’t have to worry about scorching your milk.

Heat for 10-15 mins. (each stove is different.) Use your thermometer,

Heat the milk to a temperature of 180 degrees.

Hold it there for 10 mins.


Prepare a cold water bath in your kitchen sink, don’t fill to full you don’t want to cover the pot.

Take the pot off the stove and immerse in your cold water bath.

You are cooling the milk to 120 degrees before we add our yogurt starter.

When temperature reaches 120 degrees remove from water bath and pour your starter in each jar

Filling to the top.


Stir each jar with your long spoon, mixing well.


Put on lids and bands and close tight.


Put into your ice chest and fill to bottom of lids with hot tap water. My tap water is around 118 degrees, I start at the beginning of making yogurt filling the ice chest partially with that, by the time I get the jars in the temperature has dropped a few more degrees.

You want to maintain your water between 110-112 degrees while your yogurt incubates.

(You can check it occasionally, but it seems to hold a steady temperature, if it is below, I take out a couple cups of water and replace it with hot tap water.)

Incubate about 6 hours. Yogurt should be set. The longer the incubation time, the more tart or acidic the flavor of your yogurt.

This is where you experiment: I like my yogurt tarter so I usually go between 8-10 hours. You need to taste and make your own determination.
(It will be warm so it’s not going to taste like cold yogurt)

Take jars out of ice chest, dry them off and immediately put them in the refrigerator. Rapid cooling stops the development of acid.

Greek Style Yogurt

Take a jar of your cold yogurt. Line a colander with cheesecloth or double sheets of Bounty paper towels (needs to be strong paper towels) inside a deep bowl. Pour your yogurt in the strainer and allow the whey to drain off. Put the bowl and strainer back into the refrigerator for this process. It will usually be the right consistency in 4-6 hours.

Save your yogurt

The first batch from using store bought yogurt is usually the best for using again to re-culture more milk. I make extra with that batch and freeze in 1 cup portions (an extra quart of yogurt will give you 4 starters).

Save your Whey.

It can be used for liquid in bread, soups and other uses. It has lots of nutritional values left in it.

I will give you a few recipes that I use in a couple of days for Frozen Yogurt and other good uses.

Have fun,

Margaret

Believe


Ten hours a day in a motel room, leaves you plenty of time to play with art. In my previous post I showed you some of the work I had created while I was here in Monacca, Pennsylvania and had a piece that was in process that I hadn’t come up with a quote for. I watch a lot of YouTube videos and I love Hillsong worship songs. When I was playing this one, I immediately knew these were the words I wanted to use; I titled this one “I Will Say Of The Lord.”

Here is a link to the actual video, ignore the subtitles, the song is in English.

Wishing I was at home, I’m missing cooking, and I have a lot of new recipes I want to try. I’ve watched lots of YouTube videos on making cheese, and that’s one of the things I want to experiment with. I told Harvey about my aspirations, and he just laughed and said he would get me some goats. Then I laughed and told him my kids would call me that “goat lady” cause that’s what we called people who showed goats. “We showed sheep!” Which probably made us “Those sheep people.” If you don’t know what I mean when I say “We showed sheep” here is a picture from “back in the day”

This is an over exposed picture, but its at Santa Barbara County Fair, one of our favorite places we exhibited at. From left to right Jonathan Hall, Eric Baro, Jennifer (Wonderly) Mebane, Steven Hall, and Melissa (Wonderly) Fachin. The Hall boys are my sons.

This is another favorite of mine. This is at Cow Palace in San Francisco, this is from left to right my daughters, Carissa (Hall) Plumley and Stephanie (Hall) Haynes. Carissa was Miss Bo Peep that year representing Wool Grower’s Auxilery aka “The Bo Peeps” of which I was a member. Stephanie was wearing a wool outfit and participating in Ladies and Lads Lead, which was a fashion show which included wearing a wool outfit and having your ewe dressed to coordinate. Such fun and such good memories.

Hugs,

Margaret


I’ve been making some new scripture art and thought I would share it with you. I’ve been making my background papers from scratch then adding flowers in a watercolor form I’ve been working on. It’s a style I’ve discovered by trying different methods in Photoshop Elements.

Choosing colors is the hard part, I seem to choose the same color palette every time, even though I try and start out with different colors.

The next one is a work in process. It was the first one I experimented with in this style. So here’s the challenge! Leave in the comments the scripture or favorite saying you would like to see in this art, and I will work on it.

And as you can see it’s not in the same color palette. A lot more vivid colors.


Hugs,

Margaret

Apple Farm


Last fall we were in California for five weeks living in Grover Beach while Harvey worked at Diablo Canyon. As most of you know California is my home state. Every summer as long as I can remember we took our vacation at the beach in this area, it’s like my second home; it’s where we would go for a quick weekend getaway. So I know this area quite well, which means I take tons of pictures and some of them never get to my blog.

This week The Apple Farm in San Luis Obispo, Ca, was running a contest on their Facebook page consisting of posting pictures of their gardens, which will be judged and the prize is Dinner for two at their fabulous restaurant. This is their posting:

In the spirit of our upcoming spring festival, Apple Blossom Days, we are looking for some your photos of our gardens! Post any spring Apple Farm photos that you may have and the top three (decided by our staff) will win dinner for two at the Apple Farm! You have until Monday, March 28th to post. We will announce the winners on Friday, April 1st!

So of course I remembered the pictures I took and wondered if I had anything I might enter:


And here is my entry! Because we are going back to Diablo Canyon in May and I am looking forward to that dinner for two!

I’ve been working on my family tree for the last month and I haven’t played in Photoshop very much. We bought the Family Tree Maker which comes with three months access to Ancestry.com and I am addicted, but then so is Harvey! That’s all we have done lately, last weekend we stayed up till 2am researching. You know on the commercial where they show that little leaf that tells you, “You have a history hint”? Well those little green leaves on all these ancestors’ names are driving me crazy! It becomes obsessive to get them all off my names. Thankfully my Mom and my aunt Mary have already documented a lot of our family, so that entails multiple calls to them to verify facts, which caused my Mom to use all her cell phone minutes last month.

So when I saw this contest I had to open up Photoshop and play! Today I have edited a few more pictures from that trip.

The Old Mill House

The water wheel!

And one more look at that flower! (Sorry I don’t know what it’s called.) I edited it a little more abstract and it’s a different angle,

I’m not sure if I don’t like it better!

Hugs, Margaret

Fiestaware


I love dishes! I really don’t need any more.

 I already own a set of Homer Laughlin dishes in an off white color, the pattern is called Colonial. I was researching the dishes online and found out the factory wasn’t too far from where Harvey is working in Pennsylvania, and that they were the maker of Fiesta Ware. So I decided we needed to make a trip. Last weekend we went to Newell, West Virginia to the Homer Laughlin Factory and store to pick out new Fiesta ware dishes.

Do you remember Fiesta Ware? We had a set of Antique Gold dishes and I recall the pitcher and its unique shape. If I remember correctly, we bought them at the grocery store (Mayfair Market), where you would get the accessories at a special price like .79 cents and once you got hooked buying the accessories you would end up buying the whole set of dishes. A little research shows that they were made in that color from 1969-1972.

The product was discontinued in 1973 and reissued in 1986 with new contemporary colors to mark its 50th anniversary. This year they are celebrating their 75th year of Fiesta Ware.

We programmed Homer Laughlin in the GPS and started out for a beautiful drive, about sixty miles from New Stanton, PA.

Many long brick buildings which have been there for many years.

This is the parking lot, which borders on the Ohio River, there were many buildings side by side that were identical.

The Broken Ware Garden was on both side of the entry.

As we walked in the door we entered the retail part of the store, where everything is new. We looked around and saw all the new colors.

Not sure what this color is but isn’t it gorgeous?

Now into the seconds room.

Wow! This was an experience! Since it was our first time there we had no idea what to do. But around us were people who you could tell were experts at the seconds. They had cloths and were sifting thru dishes polishing and looking for flaws. I pick up a few dishes and the only thing I can think of to get the dust off the dishes with was my sweatshirt, real professional looking Margaret! The other problem is the stacks of dishes, as you sort through them looking for the color you want you have to pile them in another pile and I was worrying about the pile getting to high and all the dishes tumbling into the floor.

I had an idea the color I was wanting before we arrived, so after sorting through dishes for half an hour we decided that this could be an all day process, so we made the decision to buy the 4 place settings new and buy the accompanying side dishes and platters in the seconds room.

The platter and the canister in the back is a Red color called Scarlet, although in this picture it is showing a pink color. The blue dishes are a color called Peacock. I love the idea of mixing the colors.

This picture is the four place setting, I had to take them out of the box and play when I got back to the room.

We are here in New Stanton for another week, then we are moving close to Beaver Valley while Harvey works at the Beaver Valley Nuclear Plant for two weeks. That is a lot closer to the factory, so I plan on making another trip, and loading up on more of the seconds. I will probably have to ship them home because our car is already loaded with dishes and a big composter in a box that we bought at Costco, so I don’t think I can stuff much more in there.

Hugs,

Margaret


This

This is my card to Harvey! The template is from Florabella Actions Facebook page the download is under Exclusive. I’ve changed it up a little bit by adding the word Love in the Outlaw font and Happy Valentine’s Day in the Fiolex Girls font from Dafont.com.

The picture was taken last week when we went to dinner with our friends Pat and Carole Kearns, who live here, outside Pittsburgh, PA where we have been for the last three weeks while Harvey is working in New Stanton,PA.

If you watch PBS you may be familiar with Lidia Bastianich, who has a cooking show that features Italian food. I happened to go to her web page and saw that she had a restaurant in Pittsburgh. So we made arrangements to go with Pat and Carole. It is located in the Market District of Downtown Pittsburgh.

The fish market is right across the street from her restaurant.

I couldn’t resist taking this picture of the fish made out of lights!

The dining room, and I loved this huge chandelier made out of glass globes, it looks like a giant bunch of grapes.


This was the appetizer course. We asked the waiter all about this dish because it was delicious! It’s fried cheese with a potato and ground pork filling between another layer of fried cheese, called Frico di Montasio or Montasio Cheese Crisp.


Carole and I ordered Lidia’s Pasta Trio, which were three different kinds of pasta. I can’t tell you what the names of these pastas were, but the white colored one was my favorite! It was a potato and leek ravioli in a butter sauce.


Served tableside and refills of your favorites!


Pat had Zuppa di Pesce, a traditional Seafood Soup with Shrimps, Scallops, Mussels, Calamari, Fish Fillets and Octopus.

This is Harvey’s dinner! Bistecca 20-ounce Bone-in Ribeye Steak with a Rosemary Sea Salt Rub, Fried Potatoes, Herb Roasted Tomatoes.

When we finished with our dinners, Dessert! I was so busy enjoying all the wonderful flavors that I forgot to take a picture of the Tirramusu, but it was wonderful! The whole dinner was a great experience! Lidia has a restaurant in Kansas City and guess who is planning their birthday dinner there in July?

Me!

Hugs,

Margaret


Super Bowl 45 is this Sunday, and here in Pittsburgh it is Steeler Fever! On the local TV station all you hear is interviews with the players, plans for game day parties, and their favorite song “HERE WE GO” !

I thought I would share with you my favorite dip! Caramelized Onion Dip, this is not your instant soup mix dip, the flavor is so much more intense and it is so easy to make.


See all that caramelized onion bit goodness!

Hope you enjoy the game this Sunday!

Hugs, Margaret


I’m in New Stanton, PA for three weeks and with lots of time on my hands, lots of time to play with Photoshop Elements 9 and create lots of new art. With all the snow on the ground I won’t be outside much taking new pictures, only one’s that can be captured from the car with the window down for a few minutes to click and then roll the window back up to keep from freezing.

Yesterday I promised you another freebie! It’s a little later in the day, but we have been having internet problems here at the motel. I imagine it’s because of the rain which does weird things to the internet satellite. But here it is!

This Valentine Subway art is made up of all your favorite words associated with Valentine’s Day! When you download this it will not have the black frame on it, I thought it would look great put in a black frame so I wanted to let you picture it that way.

This picture is an original art piece, starting with making the background paper adding the shaded art and adding the words in many different fonts.

I have been thinking of making an original art picture for wedding couples, using a similar format but in color of their choice and including a picture of the couple. Don’t you think this would make an original gift to give to the new couple? If you are interested you can contact me and I will be delighted to work on your project.

Enough babbling! To download this picture click on the picture itself and it will take you to BOX.NET where you can download it. The reason I am using this format is so you can get the picture in the highest possible quality. Today it is not in a zip format. It’s in JPEG so all you have to do is download and you can send it to Costco or Sam’s club and print out in whatever size you want.

Please leave a comment if you download so I know if anyone is downloading. Also if you click subscribe in the right hand side column my blog will be delivered to you in an email.

Thanks so much to you who read my blog!

Hugs, Margaret


Tomorrow is the first day of February so we are 15 days away from Valentine’s Day. This is a good opportunity for me to give you my friends a gift! Actually I have two gifts planned, one today and one tomorrow, and did I mention free!

I’m updating my blog so if the background and header look funny, it’s because I have changed formats to a wider photo friendly size. When I get finished the pictures will be able to display larger so you can see more details.

I’m also trying out this format for being able to download my gifts. I’m using BOX and all you have to do is go to this link and download to your computer. It is in a zip file so right click and extract. This is all new to me so if this doesn’t work well, please leave comments so I can work out all the kinks before I open my Etsy store.

Don’t forget to check back tomorrow for your second free gift!

Hugs

Margaret


This picture is of a Mail Pouch Barn in Ruffsdale, Pa, you may remember the picture I posted during the summer of the same barn?

We took a drive today, and decided to take a picture of the barn in the winter with snow.

We have been in New Stanton, PA for the past week, it has snowed every day we’ve been here and has been fairly cold so I haven’t been out taking many pictures.

I noticed this tree yesterday outside the motel and wanted to take a picture of the ice hanging on the berries.

Nature is so beautiful! The snow on the mountains around Pennsylvania reminds me of a Grandma Moses painting.

I’ll leave you with one more of the Mail Pouch Barn. It is one taken from the road and if you look to the left of the picture you see the farmer and his horse and there was a goat out there with them.

While I’m here in Pennsylvania, I have lots of time to work on Photoshop Elements9 which I got just before Christmas and have been learning all the new features. I’ve been learning how to make digital scrapbook pages and digital cards.

I’m still in the process of opening the Etsy store and developing ideas for it. I will try and post some valentine art I’ve made in the next few days.

Hugs,

Margaret


Another Christmas and New Year has come and gone! 2011 is here and with lots of new ideas and plans for the coming year!

One of those ideas this year is to actually publish my art. I’m in the process of setting up an Etsy store to sell my photography and digital art. I’m going to start with note cards and prints! And we will see where it goes from there!

I have designed and posted on Facebook a lot of these pictures with either a scripture or a quote that was applicable. I have been encouraged by my friends Debbie Rose Hosken and her cousin Dana Ledbetter back when I first started putting them up and it would take me 4-5 hours of learning how to manipulate Photoshop Elements to be able to post. I was in Pittsburgh and three hours ahead of my California friends and I would post one and Dana would immediately post back how much she liked this one and how it was just what she needed to start her day. She would be at the gym at 5 in the morning, working out and posting on her phone.

Many of you, who know me, remember the embroidery days when I started out with a mobile trailer and a couple of embroidery machines. That is where the name Ewenique came from, my original business was called Ewenique Stitches and my husband of thirty years, Steve and I would go to livestock shows, fairs, dog shows, Home and Garden Shows, Horse Shows, you name it, we went. We even went to a chicken show once! Steve always had so much faith in our abilities and I was always the one who had to be perfect, had to get it right. It was six months before I would sell any embroidery because I didn’t think my work was quite good enough. But I had good friends at the Kern County Fair who would order shirts and then awards and eventually I began to have confidence in my work. After we had been embroidering for a few years I had someone at a show bring me a jacket with a beautiful embroidery job on the back and wanted me to put an award placing on the front of the jacket. I said to her “Who embroidered the back? The work is beautiful” She replied..You did!

That is when I knew that as particular as I was, that sometimes you have to be away from a project to realize it REALLY IS GOOD! I’m not saying this to brag on my work or my art but to show you what a stickler I am for detail, and why it takes me so long to be willing to sell my art. I’m not quite the “perfectionist” I used to be, I’ve come to realize in life that there are many things you can’t control, you can only do your best.

Steve passed away unexpectedly in 2005 and I couldn’t bring myself to embroider anymore, it took two people to work a show, I did most of the designing, selling and setting up the machines, and Steve did the actual sewing. He was so good with it! Steve had been born a truck driver into a trucking family and had never done anything else but “Truck” he grew our trucking business from a one truck operation to a large business with five tractors and twenty sets of double trailers. The stress of running a business in California and all the “Government” rules and regulations and the high price of fuel caused us to look at a simpler way of making a living.

We had started the embroidery business as a part time hobby, but after we started going to shows we saw we could make a living from embroidery and sold off a lot of the trucking equipment, still doing both part time. The stress of the trucks was really getting to Steve and he decided to quit trucking permanently. He told me “that if he didn’t, the trucking would kill him” But he really enjoyed embroidering and he could make those machines hum! I guess it was the being “mechanical” he could work on anything on a truck and he could do the same with an embroidery machine. I remember at one of our first shows at the Kern County Fair, when we only had one machine and a lot of work backed up, the embroidery machine quit! right in the middle of a full jacket back. He got on the phone and a technician talked him through repairing it there at the fair. Later he said he would never be put in that position again and went out and bought a second machine. He took a lot of ribbing from his truck driving friends asking him if he “was still doing that sewing stuff” he would just smile and say this was the best job he’d ever had, that people always were glad to see you come and left smiling with their merchandise.

I’ve sorta digressed in telling my plans for the New Year, but I find that when the story starts to come, I had better write it. For so long I couldn’t talk about it without the tears coming, but I want to leave these stories for my kids and grandkids to know their father and grandfather a little better.

So now those of you, who have wondered where the name “Ewenique” came from, now know. You know a little about my artistic side. My love for photography developed in the last few years when I got a digital camera that I love and I learned how to take good pictures and edit them, from learning on the internet and taking classes. I’ve learned Photoshop Elements after two years of practicing and now I’m to the place where I think my work is good enough to offer!

Keep watching I will be telling you more about my online store in the next few weeks! (By publishing it here, it kinda forces me to do it! Don’t you think?)


I participated in a challenge at Digital Whisper for the 12 days of Christmas, everyday Kimmie would give us a challenge and a tutorial for a new technique in Photoshop. I was able to complete day 1, 9 and day 12.

The challenge for day one was “A partridge in a Pear tree” made with floral brushes. I already knew how to work with brushes, but I used an effect pattern in PSE9 called dried mud to make the gold looking color.

I looked at all the other days challenges and bookmarked them for a later time, because I had a lot of projects going and didn’t feel like I had 4-5 hours to play in PSE learning a new technique.

This picture was for day 9 –Nine ladies dancing. The challenge was to take the background picture and add a ballerina to it. My ballerina was a black and white image that I colored and blended to give an ethereal look to her. This is the tutorial we were given, it was written using Photoshop CS5, I had to adapt some of the techniques to work in PSE9.

I received an early Christmas present from Harvey of PSE9, I am really enjoying the new features. I had version 7 before and wasn’t sure if it was worth updating, but Amazon ran a special before Christmas and I got it for $50.00 so I thought I would update. Sure glad I did

So after we finished our Christmas dinner, while everyone else watched a football game, I played and made this picture.

I looked at the challenge for day 12 and thought I can do this today! Since I knew how to add borders and frames already, the other part of the challenge was to download music brushes and use it in your picture. I added the music brushes to the outside border to make the frame.

The poinsettia art was from The Graphics Fairy , check out her page for Brag Monday where you can see a lot of different art using her free graphics.


I hope you all had a nice Christmas with your family,

Hugs, Margaret

I’m linking this to Brag Monday


My sister Raynessa was a great cook, and loved to prepare for the holidays. She had at least two decorated Christmas trees, one in particular I remember was her “Cowboy Tree,” she made rope lasso’s and red bandana covered ornaments. We would go to her house for holiday dinners and there was always lots of her Rocky Mountain fudge.


I’m thinking this picture was taken in the 90’s , that’s me on the right and Raynessa next to me, and all our kids, my sister Diane (Madaline) must have taken the picture since she’s not in it!

Raynessa made Rocky Mountain Fudge for every occasion and get together we had in our family. My son Steven (That’s him making the goofy face around age 10) loved her fudge and would call her just to see if she was bringing it! I want to share with you her recipe:


Note: Raynessa used Candi-Quik, but I can’t seem to find it so I use the Walmart brand, called Plymouth Pantry Almond Bark.


When we were both first married and didn’t have a lot of experience cooking we decided to make English Toffee, we had never made candy before but decided we would give it a try. We spent the whole day laughing and goofing around, what fun we had, and we actually made a good batch of English Toffee and had some left to take home.


So today I’m making Rocky Mountain Fudge and English Toffee, remembering my beautiful sister Raynessa with fond memories, she passed away in 2005, five months after Steve passed away. I wasn’t able to really grieve her leaving us because I was still hurting so bad from having lost Steve. Today was healing for me to remember her with such good thoughts and making candy is always cathartic. We miss her, but her love of fun, and love of the holidays will alway remain with us.

I posted a version of this in 2008, but when I went to find the candy recipe today, I had to look on my blog for the recipe since I couldn’t seem to find a copy in my files. I decided I would update that post and make some new recipe cards using some of my favorite vintage Santa’s that I found over at


Looking for something different this year to take to the office party, family gathering, or for your Christmas cookie exchange? I have the answer for you Christmas Biscotti! Don’t they look festive? When packaged in a cellophane bag with a tag, they make an excellent last minute gift, and they taste great with your coffee! Or that Pumpkin Spice Latte recipe I gave you. That recipe was featured on Farm Bell Recipes at Chickens in the Road’s blog. One of the comments mentioned you could can the Pumpkin Spice Syrup in a Boiling Water Bath for ten minutes and give that as a gift also. I’m going to try that soon! Thanks Cindy P for that suggestion!

This is my gift to you!

Aren’t they gorgeous? And they taste as good as they look!

You can click print at the bottom of this post to print out this post. Or Joliprint to save as a PDF file.

Here we go!

It really helps to have all your ingredients measured and chopped before you start. Make sure your butter is at room temperature.

Cream butter and sugar together about three or four minutes till mixture is smooth.

Add flour in slowly. We added the flour in thirds, mixing each time.

Add ins. I added Craisins dusted in flour and chopped pecans. You can customize this recipe and add in your favorites! Add Pistachios for a touch of green!

Take your dough and place it on waxed paper and began to form in a log, compressing to remove any air pockets.

Rolling the dough in wax paper and forming the log.

The log should be uniform, approximately 3 inches wide and length of pan. Place on parchment paper or Silpat prepared baking sheet.

Place in a preheated oven and bake 30 minutes. It will be light brown.


Remove from the oven and let cool 15 minutes before cutting.

And just in case you’re thinking those are my hairy arms! They’re not! They belong to my stepson Willie (The Chef) who so graciously helped me with rolling them out and cutting them, so I could take the pictures and show you!

Using a serrated bread knife, cut the slices ½ inch wide on the diagonal.

Place slices on the baking pan and bake an additional 10 min. on each side till cookies become lightly toasted.

Yumm! Don’t they look good?

I dipped half the biscotti in white chocolate that I had warmed in a double boiler on the stove and let that cool, then melted my dark chocolate in the microwave and put in a baggie that I snipped the corner off of to drizzle the dark chocolate. You could also sprinkle the red or green colored sugar on to make them look festive!

Hope you enjoy this recipe! I would love to hear if you make them.


Wishing you all a Merry Christmas!

Margaret Hall Diggs

I’m linking this to The Graphic Fairy’s Brag Monday


Under the category of did you know?

That before I married Harvey and moved to Missouri, I was a barista? Well that’s throwing the word around loosely, but my family and I had an Espresso Business called Express Concessions. It was a mobile trailer that we took to fairs, horse shows, home and garden shows, dog shows you name it, and served espresso drinks, shaved ice and fruit smoothies. We had a great reputation in Bakersfield, and a lot of people liked our drinks better than “Starbucks.”

This is a knock off recipe of the seasonal favorite at Starbucks, but I think you will like it much better because you can make it at home and save the $5.00. I got to thinking about how I would make this if we served it, and came up with this recipe. Most flavored drinks start with simple syrup which is 2 parts sugar to 1 part water boiled and then cooled. You can add flavors to them to make your own flavored syrups, the shelf life is about three weeks stored in the refrigerator.

Not a coffee or espresso lover? Well how about a Pumpkin Pie Spice Chai Tea Latte? The recipe for that would be to use the Oregon Chai Tea concentrate according to the directions, add the 2 T Pumpkin Pie syrup and fill with milk. This can be served hot or over ice, for a frozen treat pour drink and ice into your blender and serve with whipped cream on top with a sprinkle of cinnamon.

Why don’t you try these recipes and let me know how you like them? You can download them by right clicking on the picture and then Save As.

Is this getting you into the Fall/Thanksgiving/Christmas mood? I hope so! I have been busy the last week since we got home, I’ve made fruitcake for the first time and I’m getting ready for Thanksgiving dinner at our house. We’ve already made the noodles from scratch and have the turkey in the brine ready to cook turkey in the morning.

I’m linking this post to Brag Monday at The Graphic’s Fairy. This is my latest endeavor with Photoshop Elements making the recipe cards , the pumpkin graphic is from The Graphic Fairy’s blog and also the etching at the bottom of the cards, made into a PS Brush is from her page. There are so many graphics there that are free. I’m thankful that Karen is so free with all her vintage art collection, check her out.

Happy Thanksgiving all!

Margaret


This is a vintage recipe from a 1940’s cookbook, I made it yesterday and some recipes are still classics.

I designed this free recipe card for you. To download, right click on picture then click as Save As, this will open a window on your computer, to save wherever you keep your recipes. The carrot graphic is a vintage image I downloaded from Karen at The Graphic’s Fairy

Because I learn visually, I am giving you a picture tutorial today.

Beat sugar, oil and add eggs and beat well.

When I decided I would make a tutorial I was already making the cake, so follow the instructions and know that I didn’t get a picture of just the oil and sugar beaten together.

I sifted together the flour, soda, cinnamon and salt with my vintage sifter.

Add to egg mixture and mix well.

Fold in Carrots and nuts.

What was I thinking, no pictures of pouring into a 9×13 pan. But you know how to do that!

Then I got sidetracked by having to go and buy some cream cheese and didn’t take pictures of making the frosting. But how about a picture of a slice of cake?

I

I’ve tried other recipes that called for crushed pineapple, and raisins, but we liked this basic carrot cake just the way it was. This is one of those cakes that gets moister a day later.

I’m linking this to Suzanne’s Vintage Thingies Thursday

And Karen’s Brag Monday at The Graphic’s Fairy.

and Cindy’s Creative Spirit Challenge.

I hope you enjoy this vintage recipe.

Hugs, Margaret


In my previous post, I showed you my sweet adorable grandson Skyler helping me make Apple Butter, so I thought I would update this post with a recipe. In the way things go around here, I find a great recipe, use it and can’t remember where I found it, because I have ton’s of old vintage cookbooks, some my own and some Harvey’s mom’s Alameda Diggs who was a fabulous cook from all who knew her. But back to that original thought… Two years ago I made Apple Butter from a great Amish recipe, so this year when I went to make more, I couldn’t find the exact recipe. I usually keep my recipes on my computer with a program called

Living Cookbook, but it wasn’t in there. I knew the procedure so thought I would just wing it and give you a brief tutorial.

Last year I bought one of those contraptions that peels, cores and slices as you turn. It sure saved a lot of time. As I would finish with each apple I would put in a bowl with ½ cup lemon juice and 2 cups of water to keep them from turning brown before I finished. Ok..Here’s where my memory slipped! I made a simple syrup with the 5 cups of sugar and 2 ½ cups water brought to a boil and poured it over the apples and baked overnight.

The recipe above I found after I finished this batch, but making apple butter is so forgiving, and there are so many ways to make it. No roasting pan? Use your crock pot!

Next morning look who came to visit Bokah as he calls me! Little Skyler

Couldn’t resist throwing this in. Skyler loves Brutus our part Mastiff part St. Barnard puppy. Yes I said puppy he’s just 2 years old and weighs 140 lbs. and stands..well you can see he is up to Harvey’s waist. Skyler wanted to keep giving Brutus kisses, I couldn’t get a picture of that, just wasn’t quick enough when he would decide to do it!

Back to our tutorial:

The next day I ran it through a food mill. If you don’t have one you could use a food processor in small batches or just use a potato masher.

Yes! Use real apple cider! Not apple juice, it gives it a stronger apple flavor. Apple cider is available at Walmart superstores usually in the produce area. I got mine from Hunts Orchard, they grow their apples down the road from us. Plus I wanted an excuse to take Skyler to their store and petting zoo! (no pics forgot the camera what kind of Bokah does that?)

This is what it’s like before you put it back in the oven, that little tea strainer has my spices in it, I didn’t have any ground cloves so I used whole ones. (told you the recipe was forgiving)

I cooked again overnight at 250 degrees.

Next you can use your Boat Motor (Immersion blender) to make it that fine consistency of apple butter. Food processor works too!

No pictures of canning it. But you ladle it into hot jars and put lids on it. Use the Ball Canning instructions for canning it. It’s really easy!

You use the same recipe substituting pears to make Pear Butter. This stuff is great on biscuits or toast. My Grandma Tubbs always had apple butter in her refrigerator and that’s where I learned to love it. I learned to can from her and wish I could say this was her family recipe but I don’t remember her making any, she always had the store variety.

Cracker Barrel has some great apple butter and you can buy it in their Country store. But try making some, now that apples are in season. It makes great Christmas gifts!

Hugs, Margaret

This was my new experiment with Photoshop Elements, to see if I could learn to make recipe cards. The Apple graphic is from The Graphic’s Fairy and I am linking this post to Karen’s Brag Monday!


Don’t you just love this old “ghost sign”? Recently on a stormy Sunday, I drove around downtown St. Joseph, MO looking for old signage.

I googled B. Newburger to see if I could find any information on this old business, but so far I haven’t turned up any.

This one is a favorite!

When I was married to my husband Steve we owned a trucking company and some of the trucks were Internationals. When I married him at 19 he had one 1975 International cabover, when he told me what the payments were I thought he was crazy. $750.00 a month! Back then that was a fortune!

The building is abandoned now, another side view.

As buildings changed owners and occupations the signs would be painted over and a new sign would be painted over it. Then over time the elements would wear away and the older signs begin to show through. I love the colors in this sign.

May’s Picture Framing ….. Douglas Chocolates and at the top something Phamacy

The Furniture Emporium probably isn’t that old, but the architecture on this building is beautiful and these old windows are still original.

I’m not sure what this old sign says, but the hoppers could have been for feed at one time.

To see more of St. Joe’s architecture you can check out this post.

To update you on where I’m at:

We arrived in Oceano, CA Tuesday for 5 weeks. Harvey is working at Diablo Canyon Nuclear plant and I get to play. Some of you may not know, but this is my old stomping grounds. Every year of my life we would vacation here on the Central Coast at Pismo, Avila or Morro Bay. I was born and raised and lived in Bakersfield, CA until 4 years ago when I married Harvey and moved to Savannah, MO which is ten miles from St. Joseph. Three of my children and there families still live in Bakersfield which is 110 miles away from here, so expect pictures of the ocean, and then some of the San Joaquin Valley and maybe some of my precious grandsons Stevie and Wade.

I’m linking to Vintage Thingies Thursday

Hugs, Margaret